
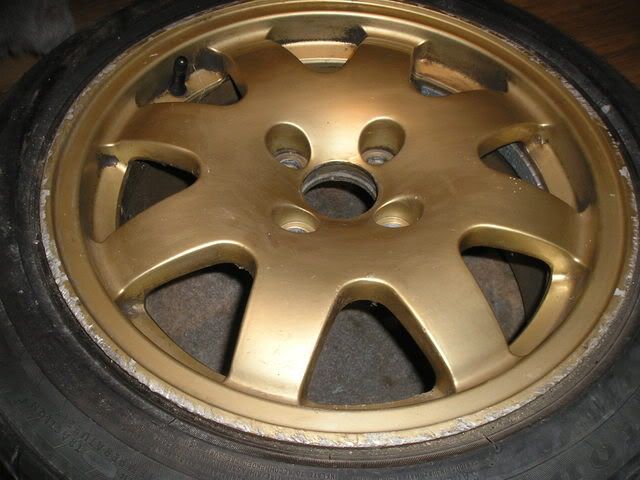
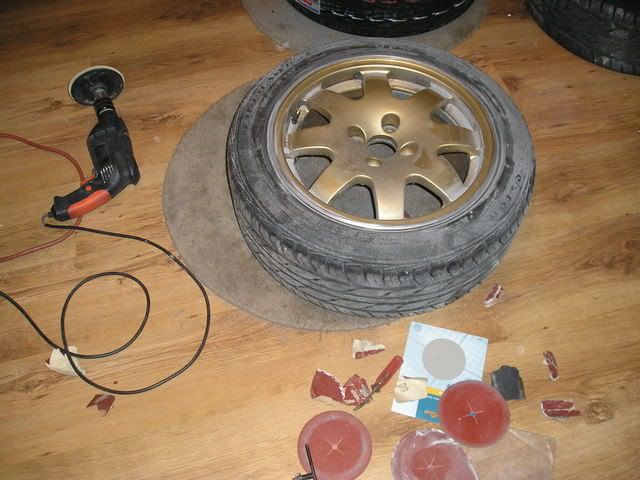
Picked up some second hand wheels last night, overall good condtion but the polished rim had been painted and 1 of the wheels badly kerbed.
Thought i'd have a go at refurbing the outer edge myself and these are the results of the worst offender:
From this:
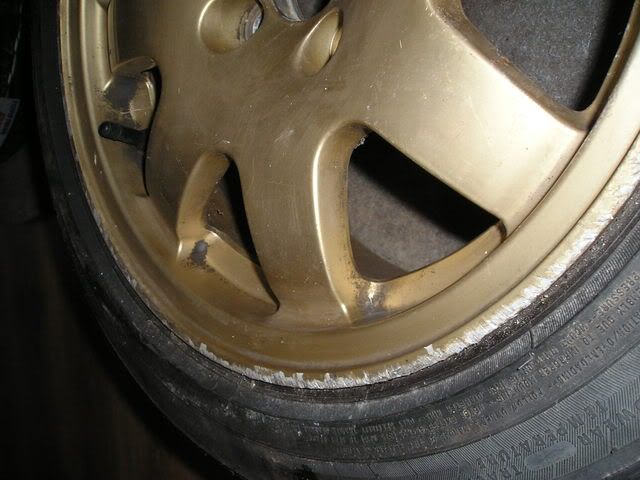
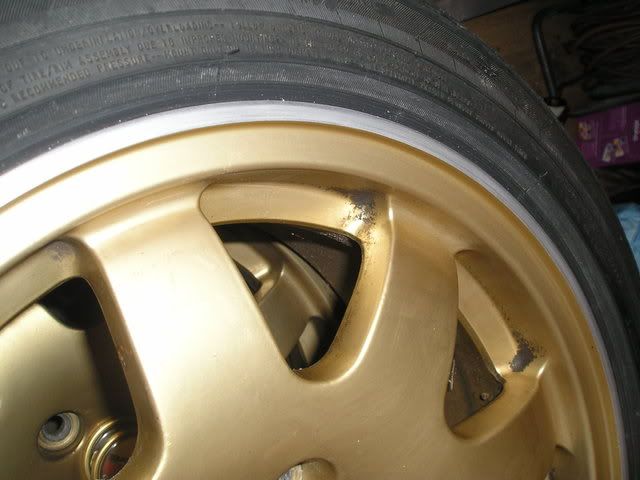
Work in progress:
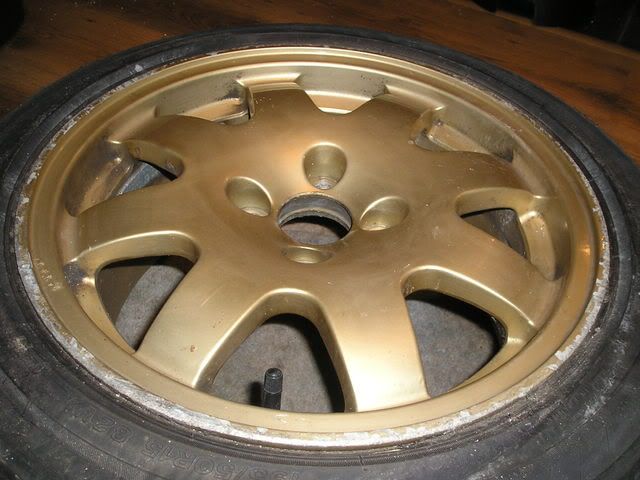
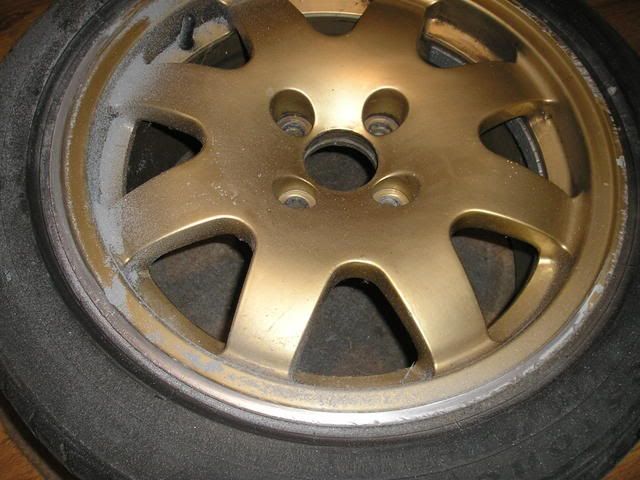
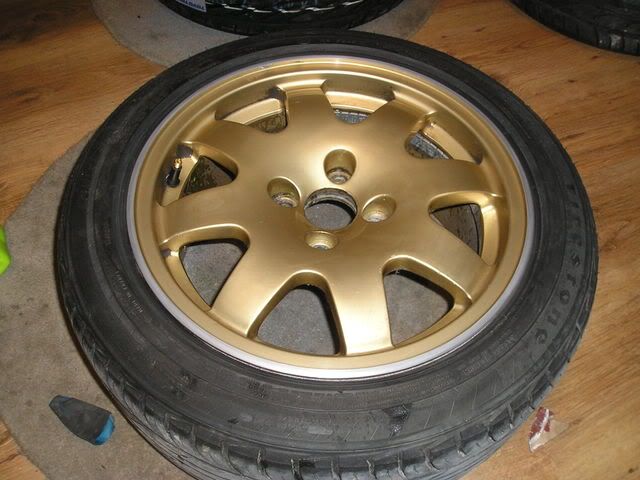
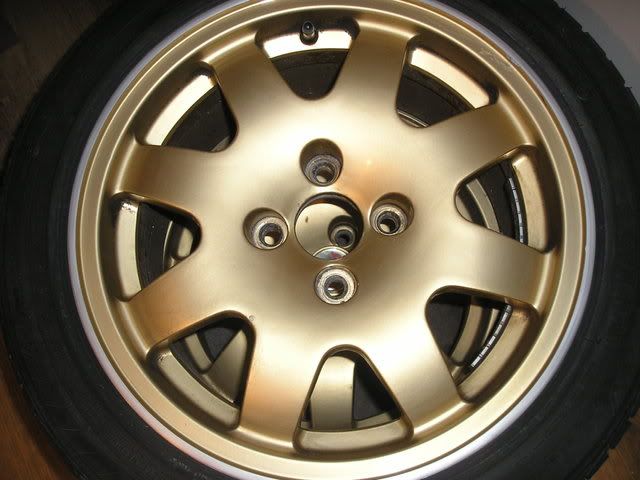
To this:
Must say i am really happy with the results.
Results 1 to 7 of 7
-
03-03-2009, 23:01 #1Forum User

- Join Date
- Nov 2007
- Location
- Sheffield
- Posts
- 167
Quick DIY refurb of my new willy wheels
-
04-03-2009, 08:34 #2Forum User
- Join Date
- Jun 2005
- Location
- Lego City
- Posts
- 7,563
so you should be

So tell all how you did it then - details man details!
-
04-03-2009, 15:58 #3Subscribed Member
- Join Date
- Jun 2005
- Location
- Southampton
- Posts
- 4,446

Very impressive......im sad u live so far away

-
04-03-2009, 17:21 #4Forum User
- Join Date
- Nov 2007
- Location
- Sheffield
- Posts
- 167
^^^^^ Thanks.
Relatively easy to do to be honest.
This is a quick guide:
1. Lay the wheel on the ground and fully examine all damage. Deep chunks out of the metal may be to deep as you will have to remove to much metal, this will have to be welded. But saying that nearly all can be removed without to much hassle.
Probably best to mask of the face of the wheel at this stage to prevent any damage, but as you can see i didn't bother.
2. Using a drill with sanding disc attached. Start with a course grade disc and work over the entire flat face of the edge. This will remove all paint and then start cutting/sanding the face back. How far you go back depends on how deep the marks are. Some marks will be deeper than other's, if you have deeper marks dont sit in one place with the sander, try to glide around the edge thus not creating any major low spots.
3. Using course sand paper i now tackled the vertical edge nearest the tyre. Sand the edge using a gliding motion and remove the majority of deep marks. If deep marks still remain use a flat metal file and again using the gliding motion carefully remove the deeper marks. Again using course sand paper give the entire edge a couple of goes all the way around trying to creating a mark free level edge.
4. Now you should have a reltively kerb free edge. It will still be roughish due to the grade of sand paper you have used. Using a finer sand paper / wetndry paper start hand sanding the entire edge, gradually reducing the grade of w'n'd until you finish of with a 1500 w'n'd paper.
5. Once you are happy with the smoothness of the sanding stage, you need to get a shine. Use a good quality metal polish (autosol) polish the metal edge up. This should create the mirror image your after.
6. To prevent corrosion of the wheel edge you now have to seal it. Mask the tyre and face of the wheel so only the polished edge is showing. Now apply 2 coats of clear lacquer, with approximately an hour between coats.
Try to let the paint dry for a couple of days as it will be soft. You can spped up this process with a heatgun.
7. Give the wheels a good clean and polish. Refit to the car and admire your handy work.
-
08-03-2009, 21:10 #5Forum User
- Join Date
- Feb 2005
- Posts
- 2,207
for future reference let the air out of the tyres, gives you more room to work, good job though
-
08-03-2009, 21:16 #6Forum User
- Join Date
- Mar 2005
- Location
- Scotland
- Posts
- 4,620
Look good mate.
-
08-03-2009, 22:36 #7Forum User
- Join Date
- May 2007
- Posts
- 1,356
Sweet!!
Can you do mine mate? lol

 Reply With Quote


Similar Threads
-
Willy Wheels Refurb
By Jesse16v in forum PicturesReplies: 19Last Post: 16-04-2008, 21:27 -
willy wheels - need refurb! offers?
By plunky in forum Items for SaleReplies: 21Last Post: 18-12-2007, 16:13 -
Prima Willy wheels copies x 4 for refurb
By VIPERONE in forum Items for SaleReplies: 17Last Post: 22-10-2007, 18:26 -
Refurb'd willy wheels, before and after pics!
By Dan_mk1 in forum PicturesReplies: 24Last Post: 27-07-2007, 13:58 -
4 willy wheels (need a refurb)
By Fred in forum Items for SaleReplies: 2Last Post: 03-09-2005, 13:48
 Posting Permissions
- You may not post new threads
- You may not post replies
- You may not post attachments
- You may not edit your posts
All times are GMT +1. The time now is 19:06.

Powered by vBulletin® Version 4.2.5
Copyright © 2024 vBulletin Solutions Inc. All rights reserved.
vb4 Watermark Generator provided by Purgatory-Labs.de
Copyright © 2024 vBulletin Solutions Inc. All rights reserved.
vb4 Watermark Generator provided by Purgatory-Labs.de